I was super excited about this project, and I wanted it to be extra fab because it's for one of my besties Leslie's birthday. So, here we go. Get your 6 pack of beer (Leslie's adventurous, so I got a variety pack from Kroger. For this project you need 7 beers, so I got a big one (you'll see why later).
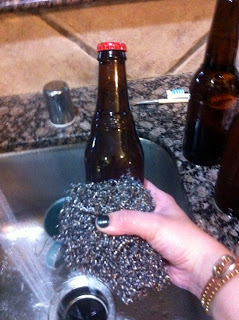
 Step 1: Rip off those labels! I got lazy so I filled big cups up with warm water and submerged the beers sans label in for a few minutes. Then i just scrubbed the glue off. You can use a sponge, fingernails, whatever. Let them dry and let's move to the labels!
 Step 2: I just printed off a gift tag template from google images. There are several options to choose from. So, my card stock is double sided (decorative plus!). I just traced (very lightly) the template onto the back of the craft paper (the back of the side I wanted to use). I then cut it out carefully. Do this x7. I like using different papers, but do as you wish :) After you're done, punch a hole with in the round part of the tag. Now, add your quotes. I wrote drinking quotes, naturally :)
Now - add the twine. I cut 7 strings about 8-9 inches long. Fold them in half, knot them any way you'd like. You have to knot them twice to make sure the knot is big enough. Feed the twine through the hole punch, and viola! Done with your tags!
Now, back to the beer. Tape off a rectangular portion of your choosing. Be sure to really press down on the edges enclosing the rectangle, so paint doesn't seep through. Pay special attention to the corners.
Using the fine grit sand paper, gently scrape the area that you'll be painting to ensure the paint will stick. Then, using the sponge, paint the enclosed area to make a chalkboard square. Promptly after painting, s-l-o-w-l-y (we're talking like a snail, people), remove the paint (I did vertical tape first, and horizontal stripes second). If you don't do it slowly, the paint may come off with the paint.

Do this x7. Let it try overnight or at least 4-5 hours. Then, repeat this at least once. I did this a total of THREE TIMES. TO summarize, not a quick craft. So glad I broke this project up into a few days. We're getting close to the end!! :)


Now -- almost done so stay with me! "Prime" the chalk by writing on the backdrop and then smudging it, that way it doesn't look brand new.

Poof -- ordinary, lame-o beer has been transformed into the prettiest beer ever. I am thrilled at how this project turned out. It wasn't necessarily inexpensive, but it's just a really unique way to give booze as a gift. Plus the gift tags can double as wine or beer charms when you have company. Score.


No comments:
Post a Comment