Sunday, October 23, 2011

Beersday

Ok guys, pictured below are the tools you will need to complete this project. There are some things missing that I got later, such as: Masking tape (substituted for painters tape, which would work best), chalk (absolute must have), markers (color of choice - for writing) and fine grit sand paper. Pictured above: card stock craft paper, sponge, twine, scissors, chalkboard paint, ad a hole punch. Oh, did I mention beer? Because you can't do it without the booze! Beer can be substituted with wine, too -- just depends on your poison :)


 I was super excited about this project, and I wanted it to be extra fab because it's for one of my besties Leslie's birthday. So, here we go. Get your 6 pack of beer (Leslie's adventurous, so I got a variety pack from Kroger. For this project you need 7 beers, so I got a big one (you'll see why later).
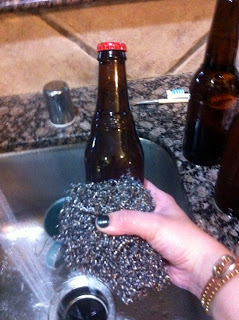
Step 1: Rip off those labels! I got lazy so I filled big cups up with warm water and submerged the beers sans label in for a few minutes. Then i just scrubbed the glue off. You can use a sponge, fingernails, whatever. Let them dry and let's  move to the labels!


Step 2: I just printed off a gift tag template from google images. There are several options to choose from. So, my card stock is double sided (decorative plus!). I just traced (very lightly) the template onto the back of the craft paper (the back of the side I wanted to use). I then cut it out carefully. Do this x7. I like using different papers, but do as you wish :) After you're done, punch a hole with in the round part of the tag. Now, add your quotes. I wrote drinking quotes, naturally :)  


Now - add the twine. I cut 7 strings about 8-9 inches long. Fold them in half, knot them any way you'd like. You have to knot them twice to make sure the knot is big enough. Feed the twine through the hole punch, and viola! Done with your tags!  


Now, back to the beer. Tape off a rectangular portion of your choosing. Be sure to really press down on the edges enclosing the rectangle, so paint doesn't seep through. Pay special attention to the corners.

Using the fine grit sand paper, gently scrape the area that you'll be painting to ensure the paint will stick. Then, using the sponge, paint the enclosed area to make a chalkboard square. Promptly after painting, s-l-o-w-l-y (we're talking like a snail, people), remove the paint (I did vertical tape first, and horizontal stripes second). If you don't do it slowly, the paint may come off with the paint.

Do this x7. Let it try overnight or at least 4-5 hours. Then, repeat this at least once. I did this a total of THREE TIMES. TO summarize, not a quick craft. So glad I broke this project up into a few days. We're getting close to the end!! :)


Now -- almost done so stay with me! "Prime" the chalk by writing on the backdrop and then smudging it, that way it doesn't look brand new.     

Poof -- ordinary, lame-o beer has been transformed into the prettiest beer ever. I am thrilled at how this project turned out. It wasn't necessarily inexpensive, but it's just a really unique way to give booze as a gift. Plus the gift tags can double as wine or beer charms when you have company. Score.

Sunday, October 16, 2011

Picture Perfect

Hey guys! This post is dedicated to frames. I tried some new techniques today that (thankfully) worked in my favor :) Frames are probably my favorite things to decorate because they're easy, and super cheap to make.

My go-to supplies: Mod Podge, sponges/paint brushes, hot glue gun, craft paper (preferably the thinner kind, not the card stock thickness), antique-ing ink, exacto knife, scissors, and paint (not shown).
 

So, gather your supplies and let's get started :) There are two frames, different styles, so we will go over the easier one first.

1. Get your frame and remove the glass. Turn the frame upside down, onto the back of your craft paper. Trace the outline of the frame, as well as the inside. Then, use your Exacto knife to cut an X in the center, so that you may cut it easier.

 2. Cut out the outlined paper. You will then use a emery board (yes -- a nail file! -- thanks Brooke for the pointer :)) to smooth out the edges, giving it a softer, blended look.

3. Using your sponge/paint brush, apply Mod Podge to the front side of the frame. I use my finders to make sure the craft paper makes it into the grooves of the frame. For beginners, I recommend trying frames with the LEAST amount of ridges or grooves. 


 4. Let the Mod Podge dry, and apply another coat to the top of the craft paper. It will look milky, but it will dry clear. Once that dries, I applied a coat of shellac for added shine and protection, however it's  not necessary. Once the shellac dries, apply any embellishments you like. I love flowers and buttons, which both were used here. I use a hot glue gun to apply any extras.


*Note: When giving frames as a gift, if you don't want to put a picture in it, be sure to jazz it up by using colorful craft paper or something. It really adds a lot.

Another frame idea:

1. Fancy up your matted frames by covering it with craft paper. Use the same technique (using the Exacto knife to cut out the center, wrap it around and secure with Mod Podge). I had to use paper clips to help mine stick, as I used the thicker craft paper.


2. Next -- painting the frame. I would suggest sanding the frame first to avoid painting it a million times!! I painted about 5-6 layers, letting them dry in between. Then, using sand paper, lightly sand areas to make the frame look weathered. Again, you guys have the option of applying shellac to protect the frame. 
 3. I decided to use distressing ink to make the craft paper part look a bit older. This was super easy. Just rubbed it with my fingers until I was satisfied. Again, I added some craft paper until I can find a picture to match the greatness that is the frame! My dad thinks he's a good candidate :)

Until next time - stay crafty!

-Kat D.

Tuesday, October 11, 2011

The Whole Caboodle - Intro

Hey readers!

I'm really excited about this blog and hope everyone enjoys it.

I will be focusing on crafts, fun running stuff, and fun/healthy food recipes. Who knows, it may expand from there. Eclectic, I know....hence the name of my blog.

Anyway, I will be posting weekly projects/posts. If anyone has any ideas they'd like to see me try, please let me know. I will always give credit to the cites I find any ideas from -- it's only fair.

Until then,

Kat D.